Tutorial
Installation
Visualizer can be installed with or without the aid of Docker, which is a tool that creates local "containers", with all the necessary dependencies to run a program, without installing these dependencies directly on the user's machine.
To perform the installation with the aid of Docker, run the command:
docker build -t hapi-visualizer .
That will create the container for Visualizer. Afterwards, it is necessary to run the command:
docker run -p < local port >:8080 -d --rm hapi-visualizer
Replacing the < local port > by the port number where you want to run the application.
Next, just enter the chosen port address (e.g. "localhost:") on your prefered browser,
and you should be able to start using the tool.
For installation without Docker, run the command:
/bin/bash build.sh run --from-scratch
And all the dependencies necessary to run the Visualizer will be installed on the machine.
After this process, you also need to run these two commands:
npm -i and node server.js.
The Visualizer will be running on port 8080 of the machine, which can be accessed through
the link http://localhost:8080/.
Please note that in addition to the options described above, our application is already available online, and can be accessed through the Link: Visualizer.
Operation
Visualizer was made to be a practical and intuitive tool, aiming to facilitate the creation of Policies made in Hapi.
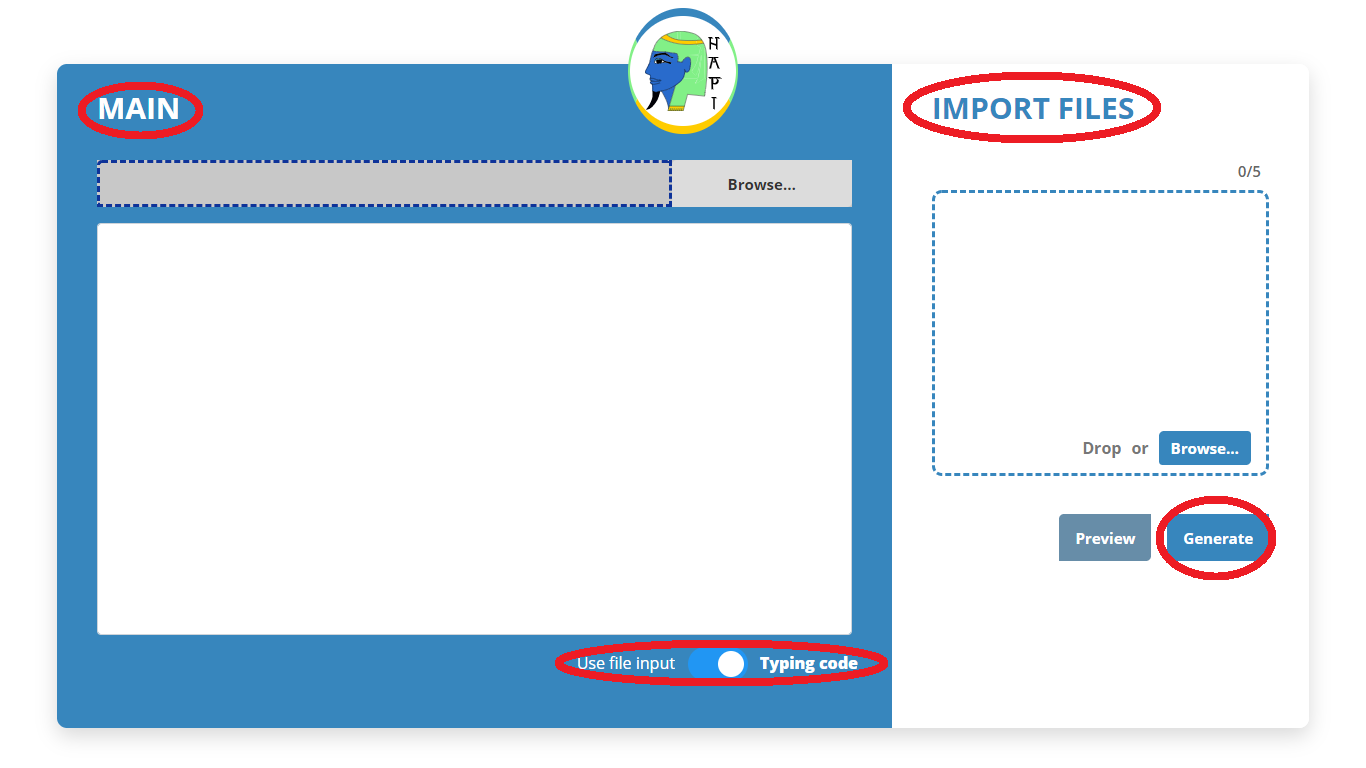
The primary interface of the application presents two fields for inserting policies in Hapi:
- MAIN - It is the field where the user will place the main body of the policy:
main = {...}. The user can choose to manually write this body, or import his main file directly from his machine, through the filter Use input file. - IMPORT FILES - It is the field where the user can import all the Hapi files that make up the body of his policy. These include lattice definition files, variable declarations, among others; with a limit of 5 imported files.
After allocating his policy in the appropriate fields, the user must select the button Generate. If the syntax of the files and the entire policy is correct, the tool will display a modal, containing the YAML file, the Data Matrix and the Lattices graphics, which can then be downloaded as needed. If the policy syntax is incorrect, the Visualizer will display an error message, indicating which error occurred, and the line it thinks is likely to have caused it.